Cài đặt Linux, Apache, MySQL, PHP (LAMP) trên CentOS 6
Chào các bạn,
Hôm nay mời các bạn đến phần tiếp theo của seri về VPS, DigitalOcean, CentOS.
Trong phần trước, chúng ta đã tạo được một VPS với DigitalOcean chạy CentOS 6.4 64bit cùng một số cấu hình cơ bản. Ở phần tiếp theo Việt Coding sẽ cùng với các bạn tiến hành cài đặt các phần mềm cần thiết để VPS có thể vận hành được website.
Các phần mềm đó là Linux, Apache, MySQL và PHP/Perl/Python (LAMP)
Bắt đầu: Hãy đảm bảo rằng bạn đã có một VPS đang hoạt động tốt.
[msg=tip]Bạn chưa có VPS và muốn kiếm một VPS giá rẻ ? DigitalOcean là một lựa chọn tuyệt vời chỉ với 5$ / tháng[/msg]
Bước 1 – Cài đặt Apache
Apache là phần mềm web server mã nguồn mở rất phổ biến, 50% máy chủ trên thế giới hiện đang chạy Apache
Kết nối vào VPS qua SSH và gõ vào lệnh sau
sudo yum install httpd
Chờ vài chục giây sau khi Apache đã cài đặt xong, gõ lệnh sau để khởi động Apache
sudo service httpd start
Kiểm tra lại bằng cách truy cập vào địa chỉ IP của server. Nếu thấy chữ Apache 2 Test page powered by CentOS xuất hiện là được rồi đó.
Bước 2 – Cài đặt MySQL
Để cài MySQL, gõ lệnh sau:
sudo yum install mysql-server
Khởi động MySQL server bằng lệnh:
sudo service mysqld start
Tiếp theo cần thay đổi mật khẩu tài khoản root của MySQL (Không phải root của VPS nhé)
sudo /usr/bin/mysql_secure_installation
NOTE: RUNNING ALL PARTS OF THIS SCRIPT IS RECOMMENDED FOR ALL MySQL
      SERVERS IN PRODUCTION USE!  PLEASE READ EACH STEP CAREFULLY!


In order to log into MySQL to secure it, we'll need the current
password for the root user.  If you've just installed MySQL, and
you haven't set the root password yet, the password will be blank,
so you should just press enter here.

Enter current password for root (enter for none):
Gõ enter để bỏ qua vì password của MySQL khi mới cài là không có (blank)
Setting the root password ensures that nobody can log into the MySQL
root user without the proper authorisation.

Set root password? [Y/n]
Nhấn Y
Tiếp theo nhập password root cho MySQL (New password: ) và xác nhận lại (Re-enter new password: ).
New password:
Re-enter new password:
Password updated successfully!
Reloading privilege tables..
 ... Success!


By default, a MySQL installation has an anonymous user, allowing anyone
to log into MySQL without having to have a user account created for
them.  This is intended only for testing, and to make the installation
go a bit smoother.  You should remove them before moving into a
production environment.

Remove anonymous users? [Y/n] y

Normally, root should only be allowed to connect from 'localhost'.  This
ensures that someone cannot guess at the root password from the network.

Disallow root login remotely? [Y/n] y
 ... Success!

By default, MySQL comes with a database named 'test' that anyone can
access.  This is also intended only for testing, and should be removed
before moving into a production environment.

Remove test database and access to it? [Y/n] y
 - Dropping test database...
 ... Success!
 - Removing privileges on test database...
 ... Success!

Reloading the privilege tables will ensure that all changes made so far
will take effect immediately.

Reload privilege tables now? [Y/n] y
 ... Success!

Cleaning up...


All done!  If you've completed all of the above steps, your MySQL
installation should now be secure.

Thanks for using MySQL!
Đến đây chúng ta đã cài xong MySQL
Bước 3 – Cài đặt PHP
sudo yum install php php-mysql
Tiếp theo cần cấu hình để Apache và MySQL tự động chạy khi server khởi động
sudo chkconfig httpd on
sudo chkconfig mysqld on
Bước 4 – Kiểm tra xem PHP có hoạt động tốt hay không
Chúng ta tạo một file PHP sử dụng hàm phpinfo() để kiểm tra xem PHP có chạy tốt hay không, đồng thời xem các cấu hình của PHP
sudo nano /var/www/html/info.php
Trong file info.php chèn vào nội dung sau:
[php]
<?php
phpinfo();
?>
[/php]
Save và thoát khỏi nano
Khởi động lại service Apache để thay đổi có hiệu lực
sudo service httpd restart
Mở trình duyệt web truy cập vào IP của server. Ví dụ : http://12.34.56.789/info.php
Nếu thấy nội dung như hình sau là bạn đã thành công
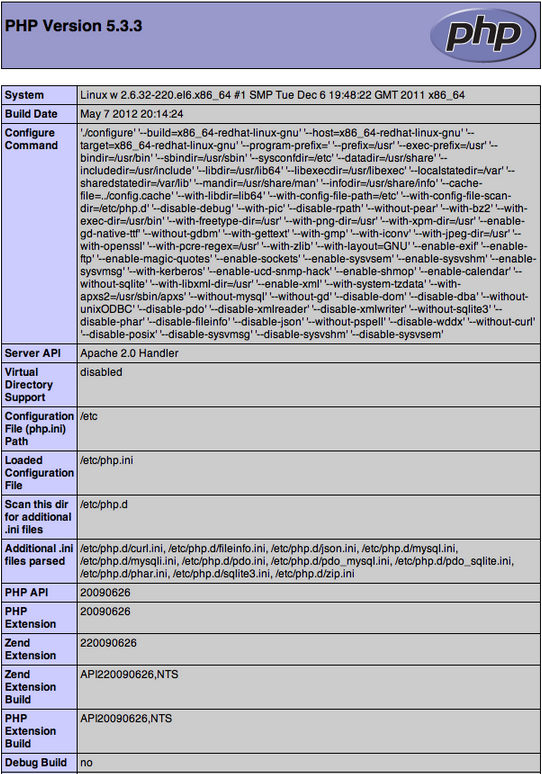
PHP Info
[msg=author]Trong các bài tiếp theo, Việt Coding sẽ cùng đi với các bạn qua việc cài đặt thêm các module cần thiết cho PHP, cài đặt một số mã nguồn mở PHP thông dụng như WordPress,…[/msg]


0 Comments