Select And Bring Forward
1. Were gonna start off by choosing a image. I used one of a piano. Feel free to download it and do the same as I did with it.

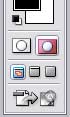
2. Now press the “Quick Mask Mode” (Q) button. Double-click to choose color and opacity.
3. Now grab the “Brush Tool” (B) and start coloring. You can eighter color what you want to select or what you don’t want to select. Doesnt really matter at this stage.

4. Go back to “Standard Mode” (Q , button left to the “Quick Mask Mode” button) and now you’ll see that eighter the part you left blank (and thus didnt paint red) is selected.
NOTE: If you colored the part you wanted to select you’ll see that is that part is NOT selected. You’ll have to press SHIFT CTRL i or Select > Inverse.

5. Now goto Filter > Blur > Gaussian Blur and I used a 2,5 Pixel radius. (Experiment with it!)

6. As an extra you can press CTRL U and set the “Lightness” to -15. And thats it for today!

Source : http://www.tutorialguide.net/select_and_bring_forward_tutorial.html
0 Comments