Tìm hiểu sơ lược về Digital Portfolio
Digital Portfolio là gì ? Trước hết, chúng ta cần tìm hiểu xem Digital Portfolio là gì ? Dịch một cách chân phương nhất là Portfolio Kỹ thuật số hay vắn tắt là Portfolio Số. Read more…
Digital Portfolio là gì ? Trước hết, chúng ta cần tìm hiểu xem Digital Portfolio là gì ? Dịch một cách chân phương nhất là Portfolio Kỹ thuật số hay vắn tắt là Portfolio Số. Read more…
Xin chào các bạn, Ắt hẳn các bạn sẽ hơi ngạc nhiên khi đọc thấy tiêu đề bài viết này. Nhưng nếu nhanh mắt liếc xuống phía dưới một chút bạn sẽ hết ngạc nhiên Read more…
Logo là một đối tượng đặc thù trong nhận dạng thương hiệu (C.I.P). Ắt hẳn các bạn đã không còn xa lạ gì với những logo nổi tiếng như Coca Cola, Pepsi, Tiger, Yahoo, Yamaha, Read more…
Xin chào các bạn, Khi nhắc đến hai chữ “giải tỏa” đại đa số trong chúng ta đều mường tượng đến những ngôi nhà bị đập phá nham nhở, gạch đá ngổn ngang, những bước Read more…
1. First of all create a new image and then right away create a new layer. Also set the background color as black, (the image size I used here is 350X500). Now make a selection one pixel wide and make it cover the whole length. Fill this selection in with white.

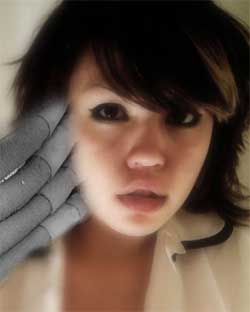
The final effect for this tutorial:

Step 1:
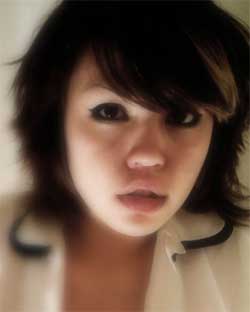
Find a good photograph ,I suggest you will use it for blog ,so I used a standard size:
First at all, we need a picture to manipulate…

1. I’ve created a new blank document in Photoshop (1200 x 1500 px at 300 dpi). I copy the image (ctrl+c) and paste it (ctrl+v) in the new document. This is called “Layer 1”. I’m going’ to do some changes in the size, cause I want to focus me more in the face. I do it… But I got some pixelation here! Well, Is time to play with some filters effect… I add some “Dust and Scratches” Filter > Noise > Dust & Scratches … I use a radious of 3 or 4… I like the painted effect that this filters give to the image.

I made some color corrections using Image > Adjustments > Curves and then Image > Adjustments > Variations. Ok, now I duplicate the layer, and blurry it the new layer (Filters > Blur > Gaussian Blur) by 15 or 20 pix. I add a layer mask and in the mask, use a gradient (from white to black, from the left inferior cornet to the upper right side of the image). This touch give me the effect of a blurry in some specific part of the image. I merge down both layers, and it result in my “Layer 1”
2. Ok, but… What about the rest of the layers? Follow me…
I like to work with pieces o’ old metals, tubes, wires, and textures…
I choose one , desaturate the image and erase part of the image:

I don’t put so much attention to the details here… Just erase all the parts I don’t like… And that’s my “Layer 2”