Photo Manipulation
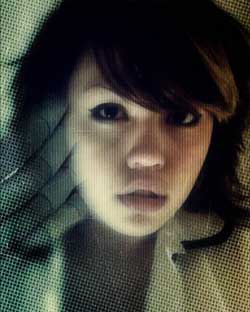
9. Ummm… For the next step, I’ve created a new layer, and fills this one with a Pattern, creating the “scan lines” effect here. This layer is in Overlay mode at the 50% of Opacity. And, is called the “Layer 9”
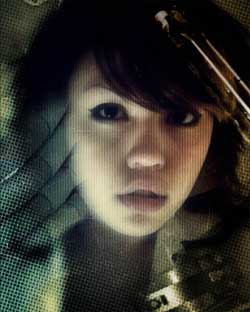
10. Well… I choose a metal object picture, again from Photobreed.com This one looks like a machine internal face… I put this one into a new layer and change the colors a bit using Image > Adjustment > Hue/Saturation… some sepia toning, I think. And now… I choose a Mask! Ha! (If you like to use the masks like me, remember: Apply Layer Mask is your friend, avoid laaaaarge files). I use a soft brush erasing here and there, and setting the layer in Hard Light mode… Finally, the “Layer 10” is here!
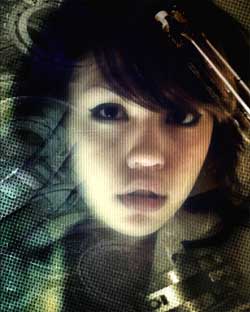
11. I used one more picture of old metal stuff (from Photobreed) I desaturate this, and erase part of the image using a mask this time in linear gradient tool, from right to left. I’ve choose Soft Light mode for this layer… the “Layer 11”

12. I’ve add an Adjustment layer, (Brightness/Contrast) using this values: Brightness: +23, Contrast: +15. This one is the “Layer 12”
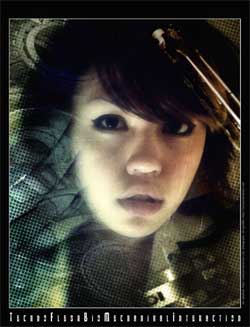
13. Well… This all the image needs, I think. The final details include the black frame around the image, a title (taken from some deep part of my mind or some song…) and of course, don’t forget to give the credits to the photographer of the image and all the stocks. You can fold all the layers in a “set” if you want to work with more order. The final image looks like this:
Important note: The author is not a natural English speaker and there is a high chance of mistakes in every way. Corrections and comments are welcome.
Source : http://www.tutorialguide.net/photo_manipulation_tutorial.html


0 Comments